
Imagine it’s now fall season and you’re on a date with a loved one, wearing your light layers and jacket.
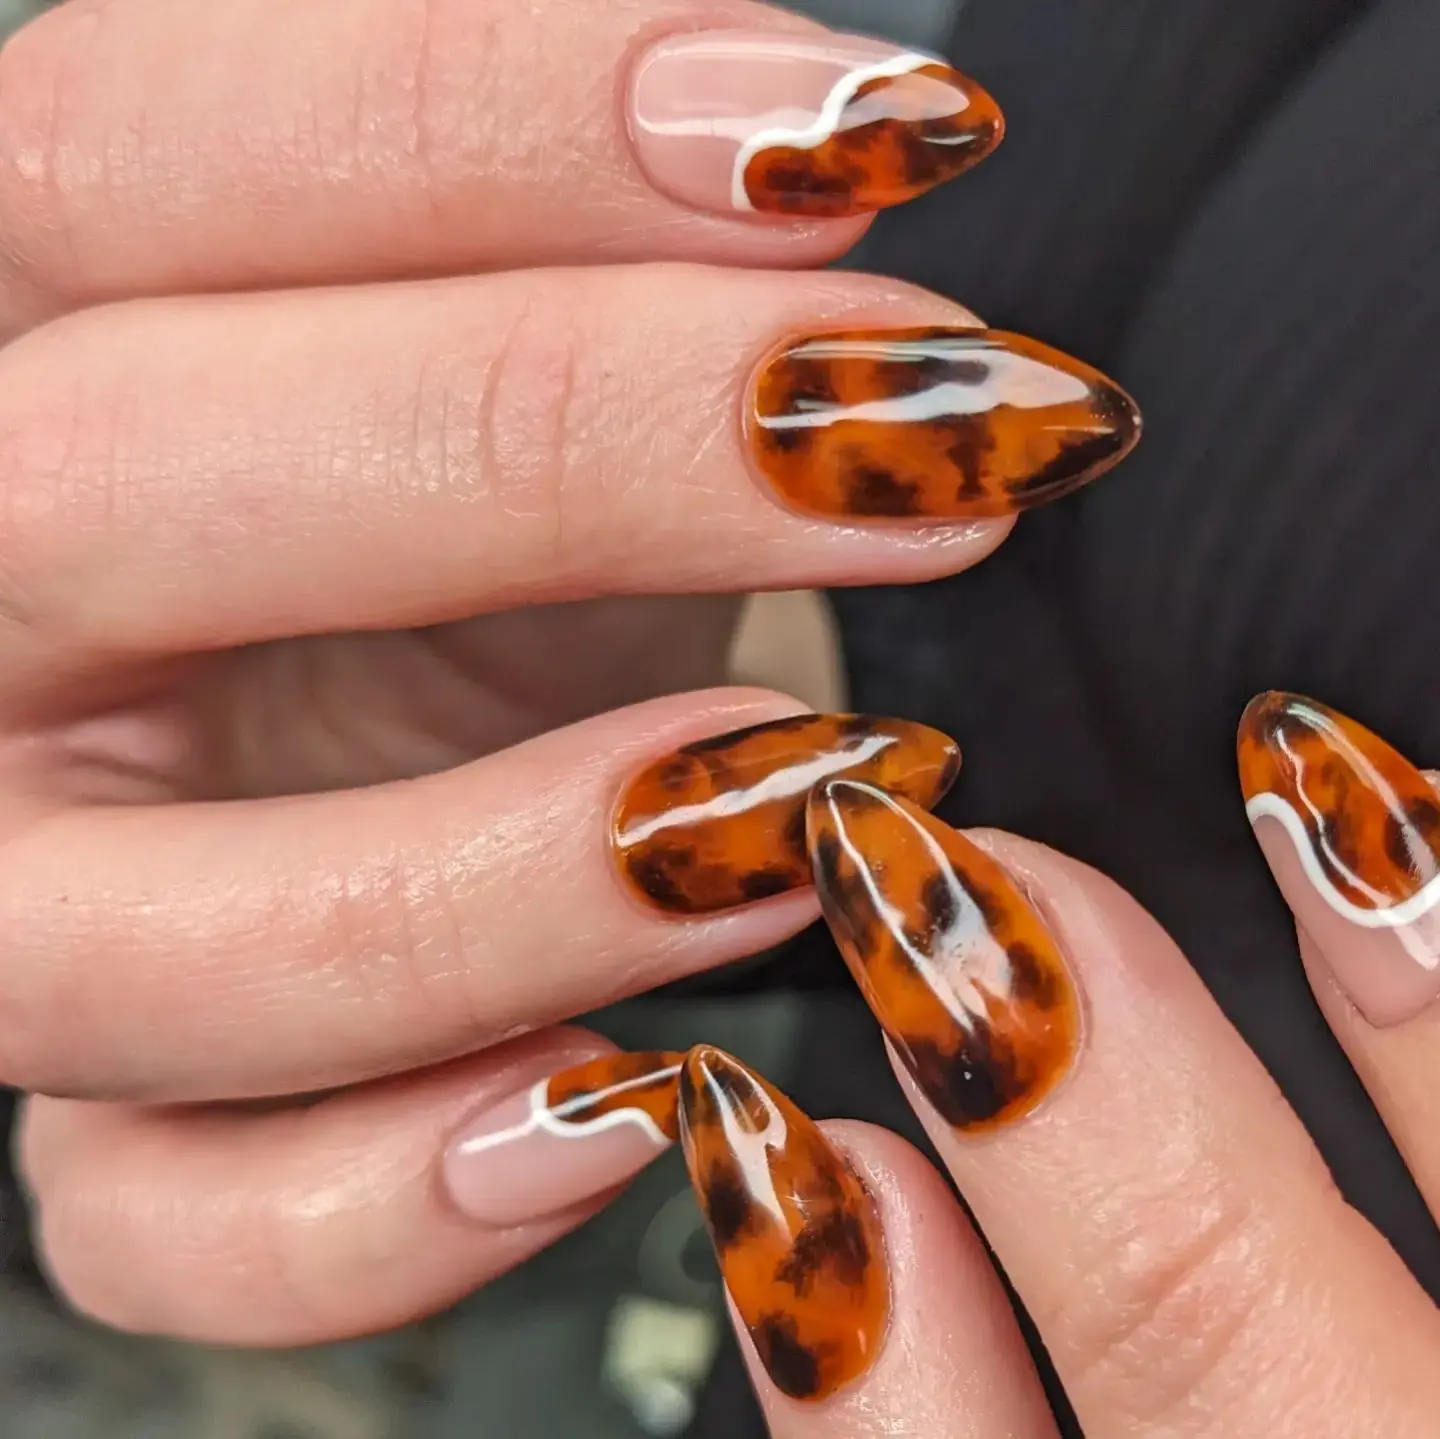
You look down at your tortoise shell patterned nails and feel time slowing down around you and your date like it’s the animal moving.
Tortoiseshell design is the hallmark of fall fashion. You see it everywhere on boots, bags, hair barrettes, fancy hair clips, and even sunglasses.
There’s something about this design that resonates with the calming feel of fall. This is why I’m a strong advocate for the use of the pattern on nails.
Tortoiseshell nails have been the rage for a while now and are definitely worth the hype. They’re so chic and versatile.
Despite how complicated it looks, this is a design you can try at home by yourself. I’m here with an easy tutorial to help you get these nails without having to go to a salon
How to Do Tortoise Nails
The most important factor in creating tortoiseshell nails is layering. Being able to create a warm contrast between the lighter and darker colors.
When it comes to technique, a heavy dose of patience is required. You have to do so many layers, and it might not work out the first time, but that’s okay.
My first attempt was so horrible, I wanted to take it off immediately. With a bit of practice and patience with myself, I’ve completely nailed (wink) the look.
I know some of you will get this look on the first try anyways. I’m confident in your abilities my friends.
Now, you can use gel polish or regular nail polish, you’ll still get your desired results. Air dry the regular nail polish and cure with a UV nail lamp if you’re using gel.
Step 1
Prepare your nails by pushing back the cuticles, trimming, filing to shape, and buffing the nail plate. If you’re using false nails, apply them after preparing your nails and file to shape.
Step 2
Apply clear nail polish, then a base color of caramel or light brown.
Step 3
Apply a second layer of your base color, then apply burnt yellow across your nail bed in careful splotches or dots. Let it dry.
Step 4
Next, paint a coat of clear nail polish. While the paint is still wet, add small splotches of dark orange nail paint. Allow this to bloom and set.
Step 5
After it dries up, apply a layer of clear polish and dab some dark brown either randomly or overlapping the dark orange painted earlier. Let it dry or cure under a lamp.
Step 6
Apply a layer of clear polish, then add black, overlapping the dark brown. Let it dry.
Step 7
Apply two layers of clear top coat to make sure every element is secure, locked in, and finish the look.
You can touch up the top coat every two to three days to make your nails last longer and avoid any pesky chipping.
Tortoise Shell Nail Styles
If full tortoiseshell nails aren’t your style or you don’t want to try painting your full nails on your first try, there are other ways you can use this design in your manicure.
Here are some of my favorite tortoise shell nail art.
1. Tortoise Shell Tips
This design makes an excellent substitute for a french tip manicure. Instead of going the normal route and using one color at the tip, try using this pattern.
2. Half A Nail
Instead of painting the shell at the tip, you can add the print to half the nail although this may require some skill and precision.
3. Half or Full Moons
Painting this pattern on a corner of your nail as a full or half moon, especially on long square nails, is a big fashion statement.
4. Accents
Instead of painting every single nail tortoiseshell, you can treat the animal print as a statement-making accent.
Paint on one nail of each hand, while the rest are plain black, a lovely red, a summery yellow, or a neutral taupe.
5. Stripes
It doesn’t matter if your nails are long or short, or whatever shape they are in. Painting a vertical or horizontal or slanted stripe on your nail is a minimalist way of getting in on this trend.
Other Fall Nail Styles
Here are some other manicure ideas that are worth skipping gloves for and can be paired with all your oversized sweaters and jeans.
1. Two Tones
Paint one hand with one color and the other with a different color or mix the two colors on one hand, with one on a finger and the other on the next.
2. French Tips
French tips are a strong statement for any season. You can try using darker colors like navy blue or army green to get into the fall mood.
3. Ombre
This variation in brown is perfect for curling your fingers around a hot cup of cinnamon tea or coffee. Try ombre nails with nude tones.
4. Sunset Ombre
The transition from red to orange is a perfect description of the change from summer to fall.
5. Butterfly Designs
Most butterfly nails we see are usually blue or pink. Match orange monarch butterflies with a beige or darker red background
6. Check
Make check patterns in colors of lilac and red, wear your warmest sweaters, and cozy up with a cup of tea.
7. Halloween Nails
Have you been waiting for the fall because of Halloween? Then try orange and yellow swirls that will remind you of pumpkin carving and Cinderella’s carriage.
Whatever your preferred design is, I recommend using colors reminiscent of fall foliage like deep reds, oranges, browns, and gold.
FAQs on How to do Tortoise Nails
What colors do I need for tortoiseshell nails?
You’ll need a base coat color that ranges from different shades of caramel to bright burnt orange, dark brown, and black for the spots, and clear polish in between layers for that glassy blur.