
Are you looking for a fun and easy way to add color to your nails? Look no further than ombre nails! In this article, I will show you how to create a beautiful ombre effect using acrylic nails. Not only is this technique simple to master, but it also allows for endless possibilities when it comes to color combinations. So grab your acrylic powder, and let’s get started on creating the perfect ombre nails.
How to Do Ombre Nails With Acrylic?
It’s best to have all your materials ready and do some initial prep.
Materials Needed
Ombre acrylic nails are a great way to add a touch of color and style to your nails, and they can be done in various colors and styles to suit your taste.
Before you begin, you will need to gather the materials for ombre acrylic nails. These include acrylic powder, acrylic liquid, an ombre brush, and various nail polishes. You will also need a few basic nail care tools, such as a nail file and buffer.
Preparing the Nails
The first step in creating ombre acrylic nails is to prepare your nails. This is an important step as it will ensure that your nails are clean and smooth and help the acrylic adhere to your nails more easily.
To begin, you will need to clean your nails. This can be done by using a nail polish remover to remove any existing nail polish or residue on your nails. You should also ensure that your nails are free of oil or lotion, as this can prevent the acrylic from adhering properly.
Next, you will need to file and buff your nails. This can be done using a nail file and buffer. The goal is to shape the nails to your desired length and shape and to create a smooth surface for the acrylic to adhere to. Be careful not to file your nails too short, as this can weaken the nails and make them more susceptible to breaking.
After filing and buffing your nails, it is essential to apply a base coat. This will help the acrylic adhere to your nails more easily and protect your natural nails from being stained by the acrylic.
Creating the Ombre Effect
Once your nails are prepared, you can begin creating the ombre effect. This is the exciting part, where you bring your creativity and color choices to life. To do this, you will need to mix the acrylic powder and liquid.
To mix the acrylic powder and liquid, you will need a small mixing tray or a palette. Start by adding a small amount of acrylic powder to the tray, then add a drop or two of acrylic liquid. Mix the powder and liquid using a brush or a spatula until you have a smooth, creamy consistency. You can always add more powder or liquid until you get the consistency you want.
Once the acrylic mixture is ready, you can apply it to your nails. Start by applying the mixture to the tip of your nails, working your way down to the base of your nails. Depending on your preference, you can use a brush or a spatula to apply the mixture.
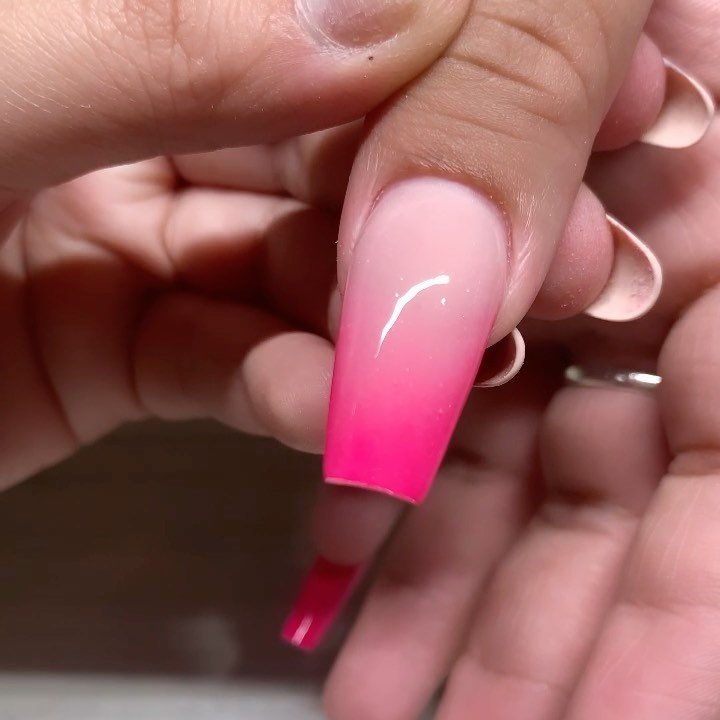
After applying the acrylic mixture, you can use the ombre brush to blend the colors. To gradually transition from one color to the next, you can use different shades of the same color or colors that complement each other. The ombre brush is specifically designed for blending colors, and it’s important to use it for this step since it will give you the best results.

When blending the colors, you can blend them horizontally, vertically, or diagonally, depending on the look you want. Be sure to blend the colors well to ensure a smooth transition from one color to the next. This step takes a bit of practice, but with time you’ll be able to achieve the perfect ombre effect.
Finishing the Nails
When you are happy with the ombre effect on your nails, it’s time to move on to the final step: finishing your nails. The final step is crucial as it will ensure that your nails look neat and polished and that the ombre effect will be protected and last longer.
The first step in finishing your nails is to apply a top coat. A top coat will give your nails a glossy finish and seal in the ombre effect, protecting them from chipping or fading. Depending on your preference, you can use a regular top coat or a UV top coat. A UV top coat will cure under UV light and give an even harder finish.
It’s important to apply the top coat evenly and smoothly, covering the entire surface of the nails. Depending on your preference, you can use a brush or a brush pen to apply the top coat. Allow the top coat to dry completely before moving on to the next step.
After the top coat has dried, it’s time to clean up any excess acrylic or nail polish around your nails. You can use a cleaning brush, or a cotton swab dipped in nail polish remover to remove any excess acrylic or nail polish around the nails. Be careful not to remove any of the ombre effects while cleaning up.
Once you have cleaned up the nails, you can use cuticle oil or lotion to moisturize them cuticles. This will keep them healthy and hydrated and help prevent the nails from cracking or breaking.
Tips and Tricks
There are a few tips and tricks that can help you achieve the perfect ombre acrylic nails. For example, using a clear acrylic powder can create a more subtle ombre effect, and using different shades of the same color can create a more gradual transition. Experimenting with different techniques and color combinations can help you achieve the desired look.
Final Thoughts
Ombre acrylic nails are a great way to add a touch of color and style to your nails. With the right materials and a little practice, you can create beautiful ombre acrylic nails that will last for weeks. Remember to take your time, be patient, and, most importantly, have fun with it!