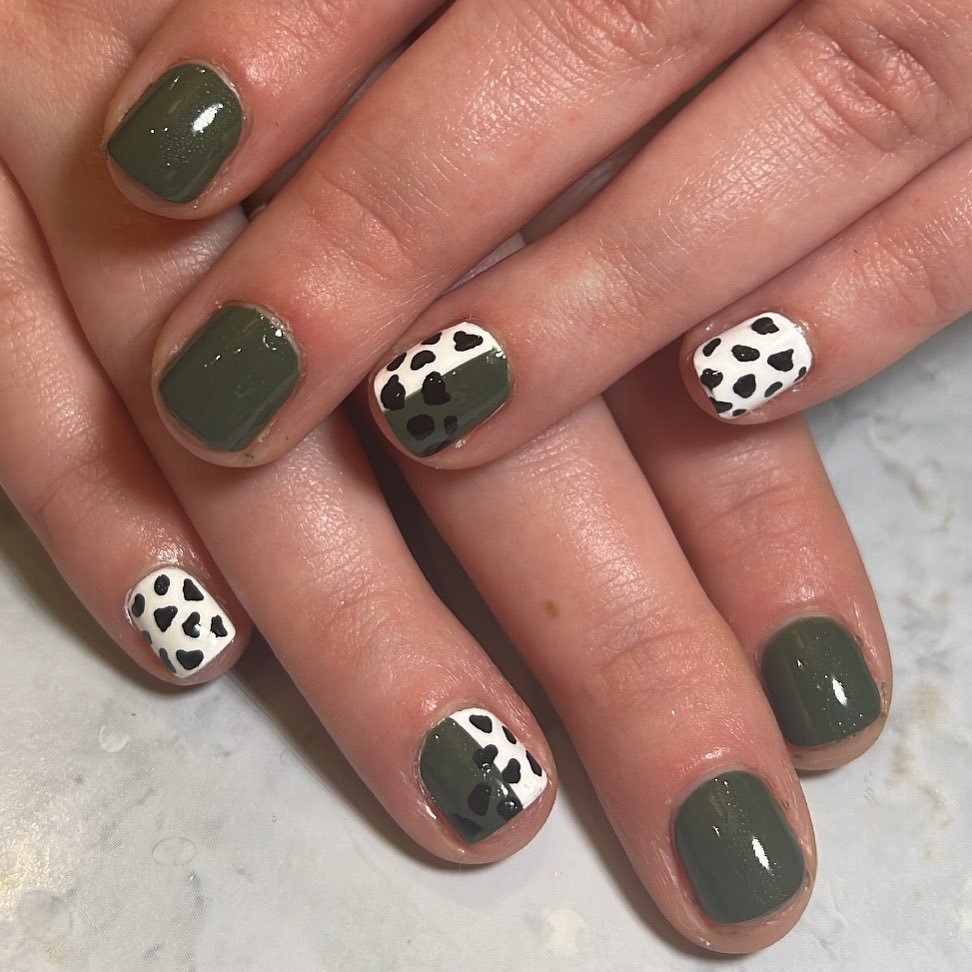
Cow print designs are one of the most trendy designs for many reasons. First, they give a playful extroverted vibe and can be tweaked to suit you.
Cow print nails are also a great complement to everything in your wardrobe. They look great on any nail shape and are unbelievably simple.
They might look complex, but cow print nails are one of the quickest and easiest designs you can do independently. In this case, any lack of precision only adds to your design, so you do not need to be an expert to achieve them.
How To Do Cow Print Nails
If you’ve got cow print nails on the list of designs you want to try but need to know how to, you’re in luck, as I will be sharing detailed step-by-step instructions on achieving them. Let’s start with the things required to achieve the cow print look.
Things You Will Need
- White Nail Polish (or any other color for your primary color)
- Brown Nail Polish
- Black Nail Polish
- Bobby Pin
- Toothpick
- Base Coat
- Top Coat
Steps to Create Cow Print Nail Design

Step 1
File your natural nails to your desired shape. It is not compulsory, but it helps make them cuter. Alternatively, you can fix acrylic nails and file them to your desire.
Step 2
Apply a base coat with clear nail polish. It is to help deter your nails from yellowing.
Step 3
Apply a layer of white nail polish to your nails and leave them to dry. Then, you should apply another layer of polish depending on the kind of polish you’re using.
Step 4
Dip a bobby pin into dark brown nail polish and make at least two splotches on each nail, excluding your thumbnail. That is if you like to do a different design on it.
Step 5
Now, dip another bobby pin into black nail polish and add more splots on your nails.
Step 6
If you want a different design on your thumbnail, you should create a cow’s facial feature. You should apply light pink nail polish at the tip of your thumbnail to form the nose. It should be the shape of an arc facing upward to the free edge of your nail.
Using your Bobby pin again, dip it in black nail polish, make your cow’s nostril two tiny dots on the arc, and then leave it dry.
Step 7
To create the other facial features, you need a toothpick or anything like that. Then, dip a tip into black nail polish to draw your cow’s eyes. You can also draw lashes on them to make them cuter and make sure the eyes are not too close to each other.
Step 8
You can now use another toothpick to add three white dots to your cow’s eyes. Two white dots should be on top and the last one underneath them.
Step 9
When it is dry, you should apply a layer of clear nail polish as your top coat to seal in your design and make them last longer.
Final Takeaway
You can change your designs to make them all cow faces or prints. You can even do a cow print design on just one nail as an accent on a different design.
Also, you do not have to make white your base color; you can experiment with any other light color.
Originally, cow print designs were defined by distinctive marks of brown and, or black splotches featured over on a white base. However, Cow print designs are versatile and can be altered to suit your need.

